

 Zaneteknits
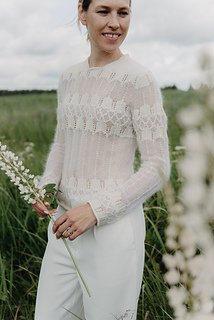
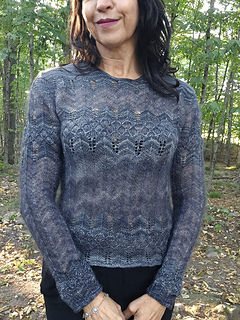
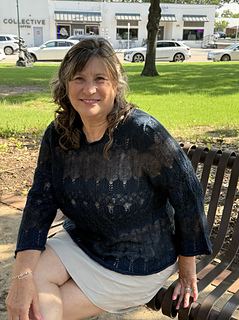
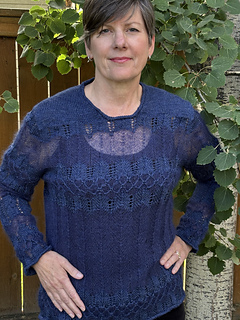


Caeli Sweater
Join our newsletter and be the first to know about new pattern releases, test calls exclusive discounts, events and other news.
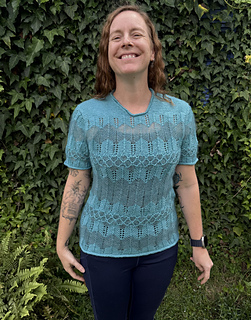
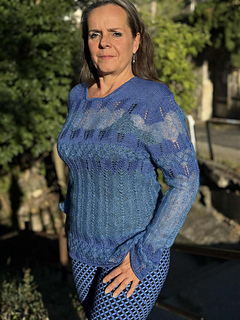
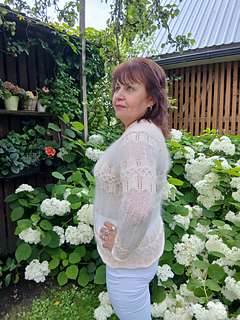
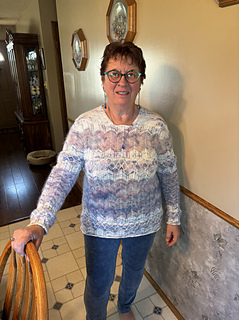
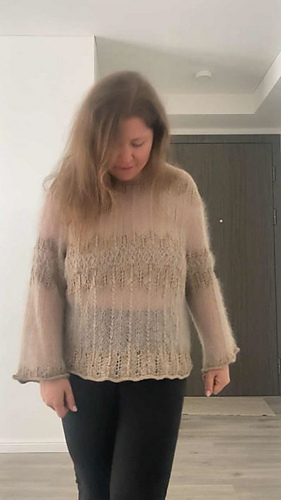
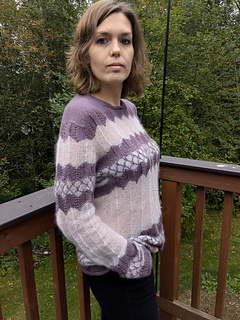
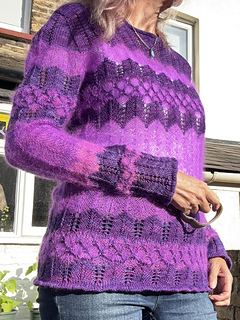
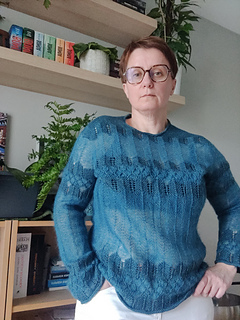
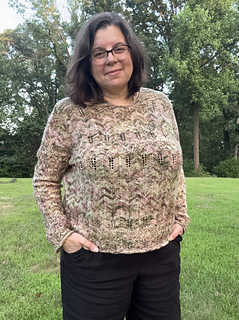
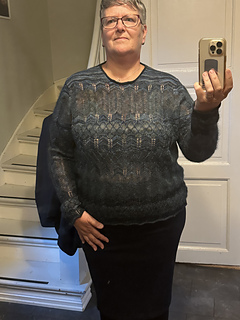
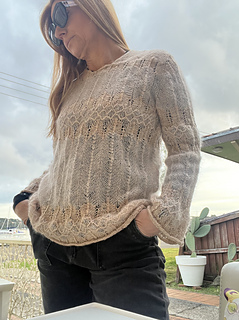
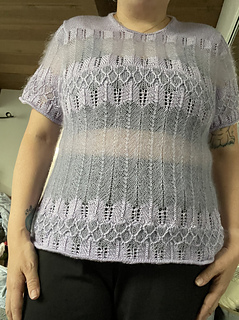
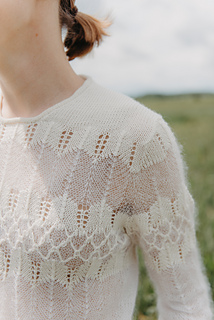
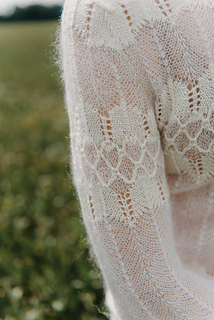
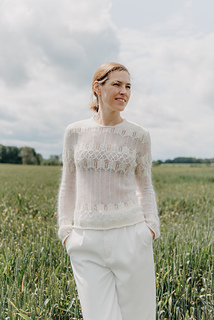
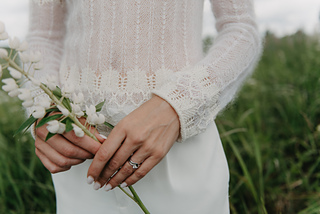
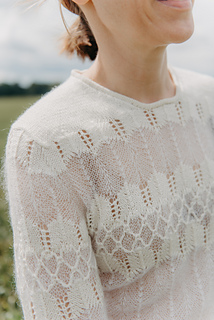
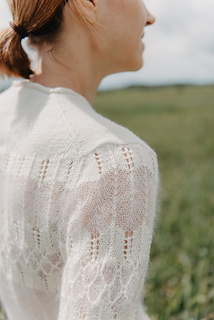
The Caeli Sweater is all about letting two very different yarns shine in one design. It started when I couldn’t pick just one yarn base, so I decided to challenge myself by combining two—but not in the usual way of holding them together. The result is a fun mix where both yarns get their moment to stand out.
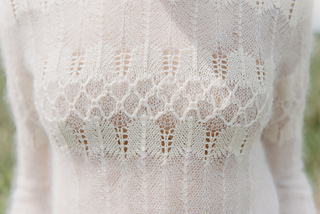
This sweater is worked seamlessly from the top down, featuring a mix of delicate lace and slip-stitch textures that highlight the uniqueness of each yarn. It’s built with a European shoulder and set-in sleeves, which are worked at the same time as the yoke. This technique creates a more detailed sleeve cap without needing short rows.
If you’re worried about the sweater being too sheer in places, the pattern is very flexible, letting you adjust the length of the stitch pattern sections to suit your style. And since it’s worked top-down, you can easily tweak the body and sleeve lengths too.
The stitch patterns might look intricate, but they’re easier to work than they seem. It’s an engaging project from start to finish, and you’re sure to get plenty of compliments when you wear it!
Translations provided by knitlingo.com
Difficulty: Intermediate. Ability to read charts is required.
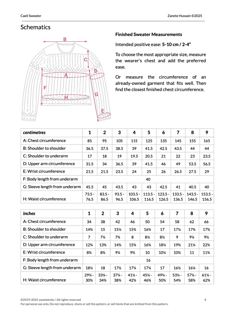
Sizes: 1 (2, 3, 4, 5, 6, 7, 8, 9)
Finished chest circumference:
- 85 (95, 105, 115, 125, 135, 145, 155, 165) cm
- 34 (38, 42, 46, 50, 54, 58, 62, 66)” Designed to be worn with 5-10 cm / 2-4” positive ease around the chest.
Yarn: Fingering weight yarn (as Opaque) and a strand of lace-weight mohair (as Sheer). Depending on the length of the sweater, allow approximately:
Opaque yarn:
- 485 (520, 565, 605, 660, 705, 750, 790, 835) m
- 530 (570, 620, 665, 720, 770, 820, 865, 915) yds
Sheer yarn:
- 520 (570, 625, 680, 735, 795, 860, 925, 985) m
- 565 (620, 685, 745, 800, 870, 940, 1010, 1080) yds
Yarn used in the sample (size 2) is 3 skeins of Pascuali Pinta (60% Organic Virgin Merino, 20% Mulberry silk, 20% Ramie; 212 m 232 yds / 50 g) in colour 00 as the Opaque Yarn and 2 balls of Pascuali Mohair Bliss (60% Organic Superkid Mohair, 40% Mulberry silk; 300 m 328 yds / 25 g) in colour 827 as the Sheer yarn.
Gauge: 24 sts & 32 rows = 10 cm / 4”
- Opaque yarn: in stockinette on smaller needles, worked flat and in the round, blocked.
- Sheer yarn: in stockinette on larger needles, worked in the round, blocked.
Suggested needles:
- 3.25 mm (US 3) or needle size that gets the gauge for Opaque yarn; circulars with sharp tips, 60-100 cm / 24-40″ long and (optional) DPNs for small circumference knitting
- 4.00 mm (US 6) or needle size that gets the gauge for Sheer yarn; circulars with sharp tips, 60-100 cm / 24-40″ long and (optional) DPNs for small circumference knitting
NOTE: Interchangeable needles are super handy since you only need to swap out the active needle (usually the RN), while the passive one (usually the LN) can stay the smaller size. If you’re using mohair as the sheer yarn, this makes knitting the sheer sections a lot easier because the sts slide more smoothly on the smaller needle.
Notions: Stitch markers, locking markers, row counter, spare circular needle in smaller size, tape measure, stitch holders or waste yarn, tapestry needle.
Techniques used: Lifted increases, lace knitting, Backwards loop cast-on, knitting in the round, grafting
Construction notes: The sweater is worked seamlessly from the top down. It starts by casting on stitches for the back neckline and shaping the shoulders using lifted increases.
Stitches are then picked up along the back shoulders to create the front shoulders, working each side separately with increases to shape the front neckline.
Next, stitches for sleeves are picked up along the front shoulder edges, and the yoke is worked in one piece down to the underarm. Increases are added along the sleeves, and body during this section.
The sleeves are separated, and the body is worked in one piece down to the desired length with optional waist shaping.
The sleeves are worked separately in the round down to the cuffs.
The collar is added by picking up stitches along the neckline and working in the round.
2108 projects
stashed 1552 times
630 projects
stashed 372 times


