

 Get Off My Lawn!


Let 'Er Rip Hat
Pattern Notes
Do you have lots of fingering weight scraps leftover and can’t bear to throw them out? Small bits that just aren’t enough for a full project? This is the perfect project to use up all those odds and ends. And the best part? This hat has very few ends to weave in! Most ends can be knitted in as you go. A video link is provided for the knitting in of ends, Just to reiterate – you do not
need to weave in most of the ends!
Color Notes
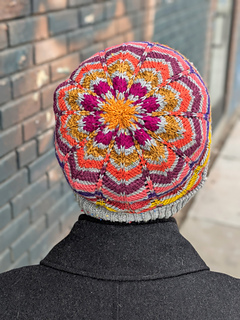
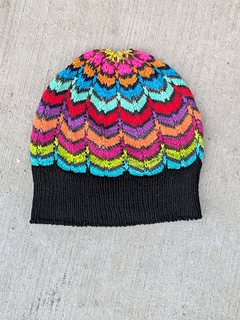
I made two versions of this hat - one uses more dark colors in the wider stripes, the other uses more bright colors in the wider stripes. Get creative and change colors the way you want!
Construction Notes
This hat is knit in the round from the bottom up, beginning with a tubular cast-on. Shaping occurs within the pattern repeats.
Ends Notes
Ends are worked in as you go. After working in ends, you can trim them to an inch or two long.
But wait until after blocking to fully trim them to account for stretching during the blocking process.
Sizes
Baby (Child, Adult S, Adult M, Adult L)
Shown in Adult S size.
Finished Measurements
Circumference: 14.5 (16.5, 18.25, 20, 22)”
Length (with brim unfolded): 8.5 (9.75, 10.25, 11.25, 12)”
Materials
Fingering Weight Yarn – all the scraps!
• Total Yarn for Hat: 40 (50, 60, 70, 80)g
Needle: US Size 3 (3.25 mm) 16” circular and dpns; US Size 1 (2.25 mm) 16” circular
Notions: Tapestry needle, stitch markers, crochet hook and waste yarn for provisional cast-on
Gauge
32 sts x 36 rnds = 4” in Chevron patts
33417 projects
stashed 59475 times
58388 projects
stashed 56846 times
137622 projects
stashed 151040 times
25031 projects
stashed 28602 times
11162 projects
stashed 14543 times
21864 projects
stashed 32438 times
105 projects
stashed 165 times


